Showing posts with label dessert. Show all posts

A ménage à trois you won't want to miss - Peanut Butter Cookie Dough Brownies

Thursday, May 14, 2015

Sad, sad news people. The absolutely incredible 3 nuts Cookie Dough Peanut Butter I bought in New York at Smorgasberg market ran out last week. I was enjoying it in so many ways : spread on toast, mixed into my porridge, as a key feature in some very delicious chia seed puddings, and in all honesty, more often than not just straight from the jar and into my mouth.

RIP - gone, but not forgotten.
But every cloud has a silver lining, and I managed to pull myself out of my nut butter mourning and launch into recipe creation mode. Looking to recreate the brilliant combination of cookie dough, chocolate chips and peanut butter, this recipe is a combination of all things good and yum - say hello to Peanut Butter Brownie Cupcakes with Cream cheese Cookie Dough icing.

The touch of cream cheese with the cookie dough makes for a very smooth, spreadable icing. And it couldn't be simpler to make! To make the icing I literally whacked everything in my blender and mixed in the chocolate chips at the end. The icing is sweet (of course), but ended up as the perfect for the rich chocolate brownie recipe I chose to follow. Taken from the incredible food blog smitten kitchen, this brownie mix which uses just cocoa powder rather than melted chocolate.

Sweet cream cheese cookie dough icing meets rich cocoa brownies. The rest is history.
I tweaked smitten kitchen's recipe slightly, through the addition of swirls of peanut butter (chunky, please) and I opted for a mix of white and brown sugar, as I felt this would provide a good sweet balance against the rich cocoa flavor. I choose to make my brownies in cupcake molds, because...why on earth not?

Peanut Butter Brownie Cupcakes with a Cream cheese Cookie Dough topping

(This recipe is adapted to make 6 cupcake sized brownies, so if using 8×8-inch square baking pan, you'll need to double it)

For the Brownies
- 70 grams unsalted butter
- 60 grams of white caster sugar mixed with 60 grams brown sugar (1 cup)
- 30 grams cocoa power (this is a little less than 1/2 cup)
- 6 tea spoons of chunky peanut butter (a spoonful for each cake)
- A wee pinch of salt
- 1 egg
- 30 grams self-raising flour (again, a little less than 1/2 cup)

For the Cream cheese Cookie Dough icing
- 1 1/2 tablespoons cream cheese, softened
- 1 1/2 tablespoons butter, softened
- 40 grams brown sugar (1/3 cup)
- Drizzle of milk (if needed. Play this by eye, only adding if it seems too thick).
- 35 grams flour (1/4 cup)
- 70 grams mini chocolate chips (2/3 cup)

Baking the Brownies
1) Get the oven on, and set it to 190 degrees. Grease chosen mold for brownies.
2) Now we want to melt our butter into our cocoa - traditionally done in a heat proof bowl over a pot of bowling water, I actually managed this just fine in a microwave. Blasts of 20 seconds are recommended, just to check you aren't burning anything. Once combined, add your pinch of salt to the chocolate butter combo.
3) Now we want to add the egg. Use a wooden spoon, and stir in gently.
4) Once the egg is mixed in, it's time to add in the flour. Fold in until it can no longer be seen, and then your brownie mix is ready! Pour into baking tray/cupcake mold, and on top on each cake nestle in a teaspoon of peanut butter, so that the surface is flat.

Making the icing
1) Place cream cheese, butter, sugar and flour in blender. Whizz on high speed for about 10-20 seconds until you reach an even consistency. If it's looking a little lumpy, here's the time to add in that drizzle of milk.
2) By now you should be seeing a clear dough-like texture. Remove from blender and stir in chocolate chips (and plenty of them).
3) Once your brownies have cooled completely, bang your icing on top.


Now these look good. 

But I couldn't help add in just a little bit more chocolate for good measure. I melted some chocolate in the microwave, and swirled it into the icing...


Because chocolate, on top of chocolate brownies and chocolate chips is never a bad idea. Make these cakes and make some special people very happy. Or...


Just be one very happy baker and munch them all on your own!

Peanut butter, cookie dough, and brownie. The sexiest ménage à trois I can think of!
A huge thanks to my lovely roommate and the all-round likable human Juan Kattan for some of these lovely snaps. You can check out some more of his photos on his Tumblr blog.

British Baking (with a Barranquillero twist)

Friday, December 19, 2014

Guess who's back in London for Christmas? After bidding a brief farewell to my beloved Barranquilla, I touched back down in London to spend Christmas with my friends and family back here in the UK. One of the many exciting things about being back home is being close to all the little things I love - especially my collection of cookbooks!
I do really love a good cookbook.
I spent an evening curled up in bed back with my old friends Nigel Slater, Nigella Lawson and Mary Berry. Having brought back various Colombian goodies with me, I could just envision one of Mary Berry's traditional English cakes with a new Colombian twist to it. And what cake is more traditional than the classic Victoria Sponge? Proving that often less is more, this simple sponge cake with just a touch of jam, cream and fresh berries is a much-loved classic and an iconic British bake. Dare I fiddle with this?

Fiddle I did, and to much success! Replacing the British strawberries with Colombian arequipe (dulce de leche to Argentinians,caramel to you and me), a touch of coconut and a passion fruit cream, here is my twist on the traditional English sponge.

Ingredients

For the Cake:
225g of butter (at room temperature, plus a bit extra for greasing the tins)
225g of caster sugar
225g of self-raising flour
2 level tsp baking powder
4 large eggs

For Filling:
200g Arequipe/Caramel
150g cream cheese
100g double cream, whipped
100g icing sugar
2 generous tbsp of desiccated coconut
Passionfruit pulp from 5 passion fruits

Equipment:
Two victoria Sponge tins
A good whisk!

(Have you noticed anything about the measurements for this cake? Equal amounts of butter, sugar, and flour. Add in 4 eggs and 2 tsp of baking powder and you have the backbone of about 100 delicious sponge-cake recipes. Learn these ingredients, practice this cake, and you have mastered a classic. How easy is that?!).

Method:

Line cake tins with cake tin liners or grease with some butter. Preheat oven to gas mark 4/180 degrees/350 Fahrenheit.

1) Cube butter and place in a large bowl. Add in the caster sugar, flour, baking powder and eggs (crack in one at a time).
2) Here you can use a hand or electric whisk to combine ingredients. You want to do this at a slow speed to gain a nice soft mixture which should drop off your whisk when lifted up.
3) Spread mix evenly between two tins and pop in your preheated oven for between 20-30 minutes, until cakes are starting to shrink away the sides and are springy when pressed. Take out and leave to cool - and when cooled the cakes can be removed from tins.
4) Now time for our filling! Get out your arequipe (or caramel, should the case be - carnation sell a
good ready made one), and spread with a smile on top of the base layer. If it's a little tough, a quick blast in the microwave helps its spreadability.
5) To make the icing, firstly whip your double cream until it is thick. Then add in cream cheese, your desiccated coconut, icing sugar and passionfruit pulp.
(To get your passionfruit pulp, simply put seeds in a strainer, and mush into the mesh with a spoon.)
6) Sandwich second sponge on top, and smooth over a bit more cream. Here your artistic license is at play - warm up and drizzle over some more caramel, dot on a few passion fruit seeds - whatever your heart desires!
A simple sponge cake tropically transformed into a coconut, caramel and passion fruit delight. Serve with a nice cup of English tea, or a shot of aguardiente (a Colombian alcoholic spirit) - that choice I will leave up to you!

Good things come in 3's...not 1, not 2, but THREE chocolate cakes.

Wednesday, August 6, 2014

I wanted to do a post about chocolate cake. But then I had a think, and decided I could do better than that. So I thought - what's better than chocolate cake? Oh, I know. Three chocolate cakes! I present to you the Chocolate Almond Flourless Cake, the Chocolate Raspberry Buttercream cake and last but not least, Nigella Lawson's Sour Cream Chocolate Cake.

Yet strangely, chocolate cake just doesn't really do it for me. By no means am I one of those weird people who just doesn't like chocolate. So before you get all...
Steady on, because I love chocolate. However, chocolate cake...I just don't really get it. It's like chocolate in a poorer format. Mix it with all that flour and butter and I think it loses its sparkle somewhat. Now obviously many chocolate lovers out there would call this slightly blasphemous. So I'm working on my love of chocolate cake. A hard task I know, but someone has to do it.

It started with the discovery of a Flourless Chocolate Cake, which is cake 1 of 3 today. It uses ground almonds instead of flour, and gets its batter-raising credentials from whipped egg whites.

To make this gluten-free cake, you will need:


100g butter, diced, plus extra for greasing
flour, for dusting
140g best-quality dark chocolate, with 70% cocoa solids, broken into pieces
6 large eggs, separated
140g ground almonds
1 tbsp kirsch or Cointreau (optional)
pinch of salt
85g caster sugar

(Original recipe from BBC Good Food)

Firstly, preheat the oven to 170C/Gas 3/fan oven 150C. Grease a 23cm/9in springform cake tin and line the base with greaseproof paper or baking parchment. Dust the sides with a little flour. Melt chocolate and butter into a heatproof bowl set over a pan of gently simmering water. Heat until melted, then remove the bowl from the pan and stir until smooth. Now leave to cool while you get on whisking the egg whites.

Separate eggs. Yolks can be mixed in with ground almonds, while the whites need to be whisked with the sugar until soft peaks form. If you're unsure of what soft peaks are, this will help:
You want them sticking to your whisk, but not completely firm. While whisking, slowly add all the sugar. Now you want to slowly fold the whisked egg whites into the chocolate,almond and yolk mixture. I say fold, not just combine, as this step is very important in getting a light, airy cake. Check the quick video for a guide as to how to do this properly.

Once that's done, pop the mixture into the prepared tin and bake for 30-35 minutes until well risen and just firm to the touch. Cool in the tin, and don't get disheartened if it cracks or shrinks. It's perfectly normal and will still taste fantastic.

This cake goes down really well, as although it's very rich the ground almonds add a real lightness to it. You can leave it plain or, like I did below, slice it in half and ice it. A simple ganache of melted chocolate and double cream (equal measures of both) is fantastic, and with a sprinkle of pomegranate seeds it's almost like one of your five a day.


Now time for the Chocolate cake with Raspberry Icing. Made with real raspberries, it's a perfect chocolate/berry combo. 

For the cake:
50g cocoa powder
6tbsp boiling water
3 large eggs
50ml milk
175g self-raising flour
1tsp baking powder
100g soft butter
300g caster sugar
For the raspberry icing:

100g butter, cubed and at room temperature

75g cream cheese

150g raspberries

250g icing sugar, sieved


The chocolate cake recipe comes from the ever-fabulous Mary Berry. It's essentially just a chocolate victoria sponge mix and is a great base for a variety of icing and topping options.

Heat your oven to 180°C/gas mark 4. Use 2 victoria sponge sandwich cases for this - grease and line bottoms. You then want to measure the cocoa into a bowl, add the boiling water and mix until you form a rich, chocolatey paste. DON'T eat it. Or do, and learn pure cocoa by no means tastes as good as it smells.
Deceptively delicious looking, tastes much like bitterness personified.
Add the remaining ingredients and mix until well combined - use a whisk and some elbow grease, or use a hand mixer or food processor - far easier. Now to just divide the cake mixture between the prepared tins and bake in the pre-heated oven for about twenty-five to thirty minutes until well risen and shrinking away from the sides of the tin.

For your icing, whip out my favourite...good old frozen berries! You can use fresh, but frozen works just as well. Defrost slightly in the microwave, then blend up.


Once blended, it's a little bit annoying but we've got to get rid of those pesky pips. So push blended berries through a sieve into a bowl, and you should be left with some delicious fresh raspberry puree in the bowl. Now you want to blend this with your butter and cream cheese, along with the sieved icing sugar. This results in a gorgeous pink, thick icing. 
Sieving out pips.
Ice the top of one cake, then place the other on top and repeat. Decorate with a few extra berries, and your raspberry chocolate cake is done!
Aswell as tasting great, it looks smashing too.

By this point, you might start thinking I'm not as reluctant to bake/eat chocolate cake as I initially set out to be. And with the discovery of this third and final cake, I feel sure my feelings towards chocolate cake have changed dramatically for the good. It's moist, rich, and really everything you'd want a chocolate cake to be. This is a Nigella Lawson recipe taken from her book How to be a Domestic Goddess. Make this cake and you will have more than earned your domestic goddess stripes.

Sour Cream Chocolate Cake
For this cake, you will need:

200g plain flour

200g caster sugar

3/4 tsp baking powder

1/4 tsp bicarbonate of soda

1/2 tsp salt
200g soft unsalted butter
40g best cocoa
150mL sour cream
2 large eggs
1 1/2 tsp vanilla extract


Ingredients for Icing

80g milk chocolate

80g dark chocolate

75g unsalted butter

125ml sour cream
1 tsp vanilla extract
1 tbsp golden syrup
300g icing sugar, sieved
1/2 tsp hot water


Quite a lot of ingredients! But it's actually a complete doddle to make. All you have to do is mix the flour, baking powder, bicarbonate of soda, cocoa, butter, eggs, vanilla and sour cream in a food processor or electric mixer and mix until you've achieved what looks (and tastes like...mmm) like a good, chocolately cake batter. Divide cake mix between the two tins and bake for about 25-30 minutes. When cake is done it will start to shrink away from the edges of the tins. 

While that's baking, make the icing. Melt the butter and chocolate in the microwave or over a gentle heat on the stove, combine fully and leave to cool a little. Now stir in the sour cream and vanilla. This is when it all starts to look fantastic.
Marble swirls of delight

Add in your golden syrup and sift in the icing sugar and whisk together. My icing was a little runny for my liking, so i popped it into the freezer for 10 minutes which worked well. As for icing the cake, you'll want to leave it to cool down beforehand, but pretty much...just slap it on! In an attractive manner, of course

I found some sugar flowers in my cupboard and decorated it with those - perhaps you could use sprinkles too? Or go very retro and dig out those silver icing balls from your birthday parties as a kid.


Three chocolate cakes down, and I've not only found a love for chocolate cake but also a whole variety of chocolate cakes for different occasions. Bake your flourless chocolate cake for something a bit posh, as its dense chocolate flavour is ever so sophisticated. The raspberry one is visually stunning and makes a great cake to bring to any party. And make the sour cream cake for when you seek nothing but pure, smooth, chocolatey goodness. They went down well with these lovely people and I highly recommend giving them a go!
Lydianna getting stuck in to some sour cream chocolate-y goodness...
While Johno quite literally couldn't get the chocolate almond cake in his mouth quick enough!
A very pretty Chocolate Raspberry cake...
Fitting for these two gorgeous girls!

Quinoa, Sweet Potato and Spinach Baked Eggs with Berry Frozen Yogurt

Tuesday, July 29, 2014

You can't beat a good egg. Poached, fried, scrambled, in an omelette or a frittata, there're so many things you can do with eggs. They are also filled with goodness. Eggs contain a whopping 18 different vitamins and minerals, provide us with the highest nutritional quality protein of all food sources and are a source of omega-3 fats (the healthy fats). So it's fair to say these little-shelled beauties pack quite the nutritional punch. But should you be looking for something slightly more exciting than scrambled on toast, this could well be the dish for you.


Cooked in a tomato-pepper sauce with quinoa, spinach and mashed sweet potato, these baked eggs are a great lunch or dinner dish to share. Served with a mixed leaf, tomato, avocado and pomegranate salad and some quick homemade frozen yogurt, this dish was the main of choice for a summer lunch alfresco at mine with some of my very lovely friends. 

For this dish, you will need:

Egg Bake
200g quinoa (mine is red and white blend - I really like the colour and texture, but normal quinoa would work just fine)
3 sweet potatoes, peeled (add in 1 tbsp grainy mustard, a squidge of tomato ketchup and a generous grind of black pepper for mashing)
Half a big bag of spinach 
2 peppers
1 onion
Can of chopped tomatoes
1 tbsp of tomato pesto
1 tsp of harissa paste
1 tsp oregano
9 eggs

Salad
Big bag of mixed leaves
A couple handful of cherry tomatoes
1 large avocado
Any seeds/nuts you fancy to scatter over
Seeds of half a pomegranate
Maple syrup (or honey) and olive oil for drizzling
Good grinding of salt and pepper

Homemade frozen yogurt
150g frozen raspberries
250g yogurt of your choice 
2 tbsp of honey

Start with the frozen yogurt so it can chill in the freezer while you do the eggs. This really is the very simplest of desserts, and always goes down well. The ingredients are variable, and you can use any frozen fruit or flavour yogurt you fancy. I went for raspberries and used a mix of vanilla and greek yogurt.
Place the frozen fruit and yogurt into a blender, and blend until minimal fruit chunks remain and the yogurt and fruit are completely combined. Pop it into a tupperware like this one here:
And into the freezer it goes. It's good to serve when it's still a bit soft, as if you leave it to really freeze up it gets a bit crystallised. It's just an incentive to eat it all up in one go really!

Now let's get cracking on the eggs. Cook your quinoa for 15 minutes, and while this is happening you can peel and chop your sweet potato into cubes, ready for steaming or boiling. If you can, steam them as this retains more vitamins, and in a steamer like this:


It's dead easy. You want to steam or boil them for the same time the quinoa is cooking, and while they're both cooking away we can get on with the tomato sauce.

This is a simple tomato sauce with a few key add-ins.


The harissa gives it a slightly spicy, tomato-y tang, and the tomato pesto adds a rich creamy flavour. Oregano is to tie it all together making some form of italian-type sauce, but again...as with my energy bars, this recipe is a bit of an improvisation, so work with what you want to make a tasty tomato sauce!


Our sauce is going to have onions, garlic and peppers - I used one red pepper and one yellow. 


Cook the onions for 5 minutes and then add the sliced peppers. Here you want to add in your harissa, pesto and oregano, followed by the chopped tomatoes. If you have a hand blender feel free to whizz this up -I used my food processor, but it could equally be left chunky.


With the pesto, harissa and pepper mix you have a delicious tomato sauce that would trump any shop bought equivalent. With the sauce done, it's time to attend to our quinoa and sweet potato. Take the quinoa off the heat and drain, and mash the potato. Here I threw 1 tbsp grainy mustard, a squidge of tomato ketchup and a generous grind of black pepper. Now mix all together in the pan with spinach until wilted...
And you have the base for your eggs! Spread in a baking tray, and make little circular indentations for eggs to nestle in. Crack in eggs, and don't worry if the whites spill over their allocated mini-holes.

That goes into the oven at 200 degrees celsius for about 10-15 minutes, and now we can make the salad. There's no real art form involved in this, it really is just a combination of all the ingredients in a bowl, and for the dressing I chose a very simple olive oil drizzle with a touch of maple syrup - I use this slight sugary touch to really bring out the sweetness of the tomatoes. If you find the task of deseeding pomegranates slightly daunting, fear not. See this youtube clip for a quick and easy way to do it!


Serve all together, bringing out the frozen yogurt just before serving. 


The muffins served alongside the yogurt were baked by my wonderful friend Lily, and are from an Ottolenghi recipe. They were truly sumptuous - nutty and rich but not overly sweet, they went down a treat. I found the recipe reposted on the website What Rachel Ate, which is also a fantastic blog.
All this delicious food, and the company of some gorgeous girls and sunshine. A perfect afternoon!


A berry, berry good loaf

Saturday, July 19, 2014

I always think you can't go wrong with a loaf cake. Some of the best and most classic of cakes lend themselves very well to this bread-like shaped bar of deliciousness - lemon drizzle loaf anyone? Banana bread slice? Perhaps a carrot cake loaf? I'll take all three.

The great Nigel Slater was not wrong when he said 'There is something elegant and timeless about a slice of plain cake', but sometimes you want to mix things up. So taking our classic lemon drizzle, I wanted something equally as moist and lemony, but perhaps with more fruit, and why not throw in some chocolate while we're at it...


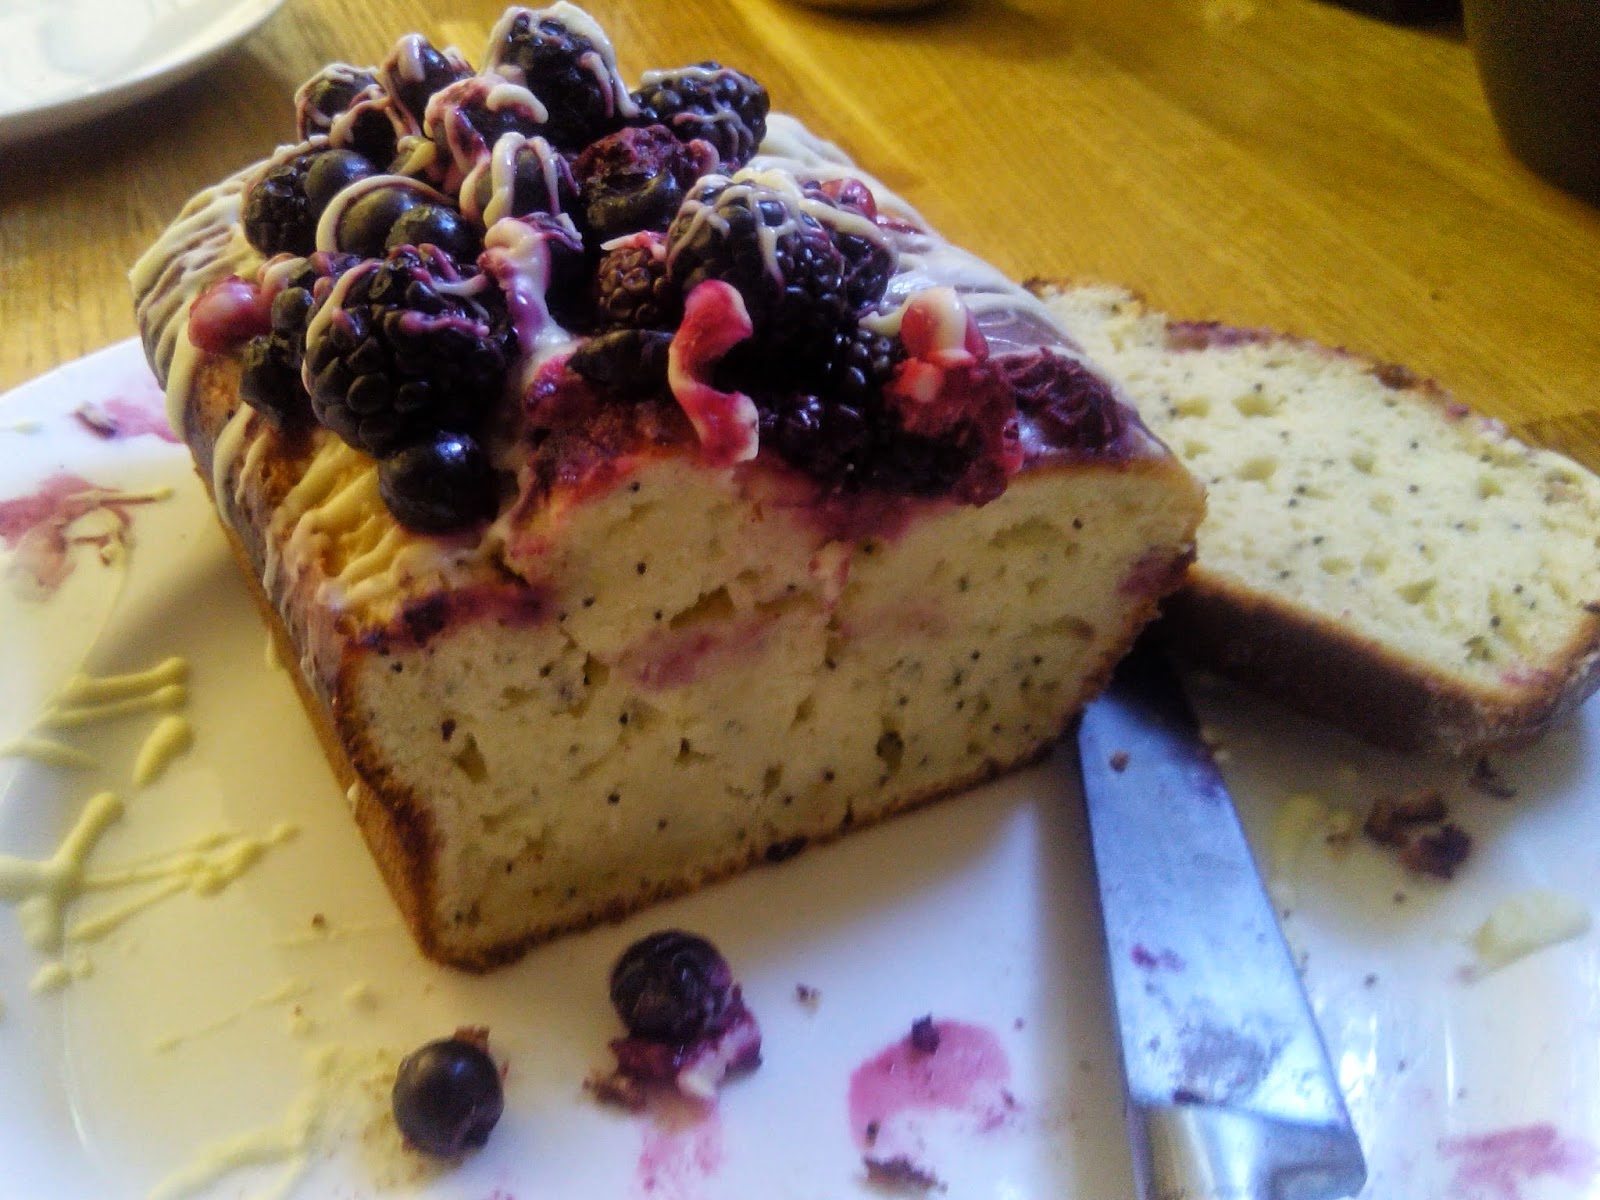
Low and behold the Lemon Yogurt Poppyseed loaf, with summer berries and a white chocolate drizzle.


It is a real beauty, and pretty darn simple to make too. What are you waiting for?!


For this loaf of loveliness, you will need:


150g plain flour
2 tsp baking powder
90 ground almonds
175g caster sugar
200ml natural yogurt
50ml sunflower oil
3 medium eggs
Zest and juice of 2 lemons
25g poppy seeds
75g white chocolate
150g berries


I've adapted the recipe from Red Magazine's website and you can see the original here. My version favours more ground almonds and less flour, and more yogurt instead of oil - this is the trick for a really sumptuous moist bake in my opinion. You don't have to buy expensive fresh berries, and I was very pleased to find some of these hiding in my freezer


For £2 you get about twice as many berries frozen as you do fresh, and after 20 seconds at full whack in the microwave they're about the same (careful though, too long and you end up with berry sauce - a mistake I've previously made).

The joy of this cake is that it really is so simple to make. You just mix the flour, almonds, baking powder, caster sugar, poppy seeds and lemon zest in a bowl, then in a large jug (or blender if your lazy like me) combine the yogurt, eggs, oil and lemon juice. When that's done mix the dry ingredients well into the wet mixture and pour into your loaf tin (which you will have greased already, naturally).


It goes into the oven for 40 minutes at 180 degrees celsius. 


Leave out to cool in the tin for 5-10 minutes, then take out of the tin and leave for a further 10 minutes. Now comes the fun bit - berry placing and white chocolate drizzling!


Melt your white chocolate in the microwave and then...drizzle away. I like using a small dessert fork as you instantly get three little drizzles going on at once, but a knife does pretty much the same job. After one layer of drizzle, pop on your berries- the melted white chocolate should help them stick. Then, just because it's so much fun, drizzle again! And there you have it.


Just make sure you get to it before your greedy family members!
Made With Love By The Dutch Lady Designs